Configure a model in the Modelling App
This is step 7 of the workshop. A configured model is a model template plus a chosen set of options - a ready-to-run variant. The stock models you used earlier (like CHAP-EWARS Model (chapkit)) are configured models; here you build your own variant in the Modelling App's New model form. The API version does exactly the same over curl.
We will build a variant of the chapkit EWARS model that turns on region-specific seasonal effects and uses the climate covariates.
Before you start
DHIS2 + chap-core are running and connected, and the Modelling App is installed (step 5: install the apps). You have worked through evaluate and predict (step 6), so the run flow is familiar.
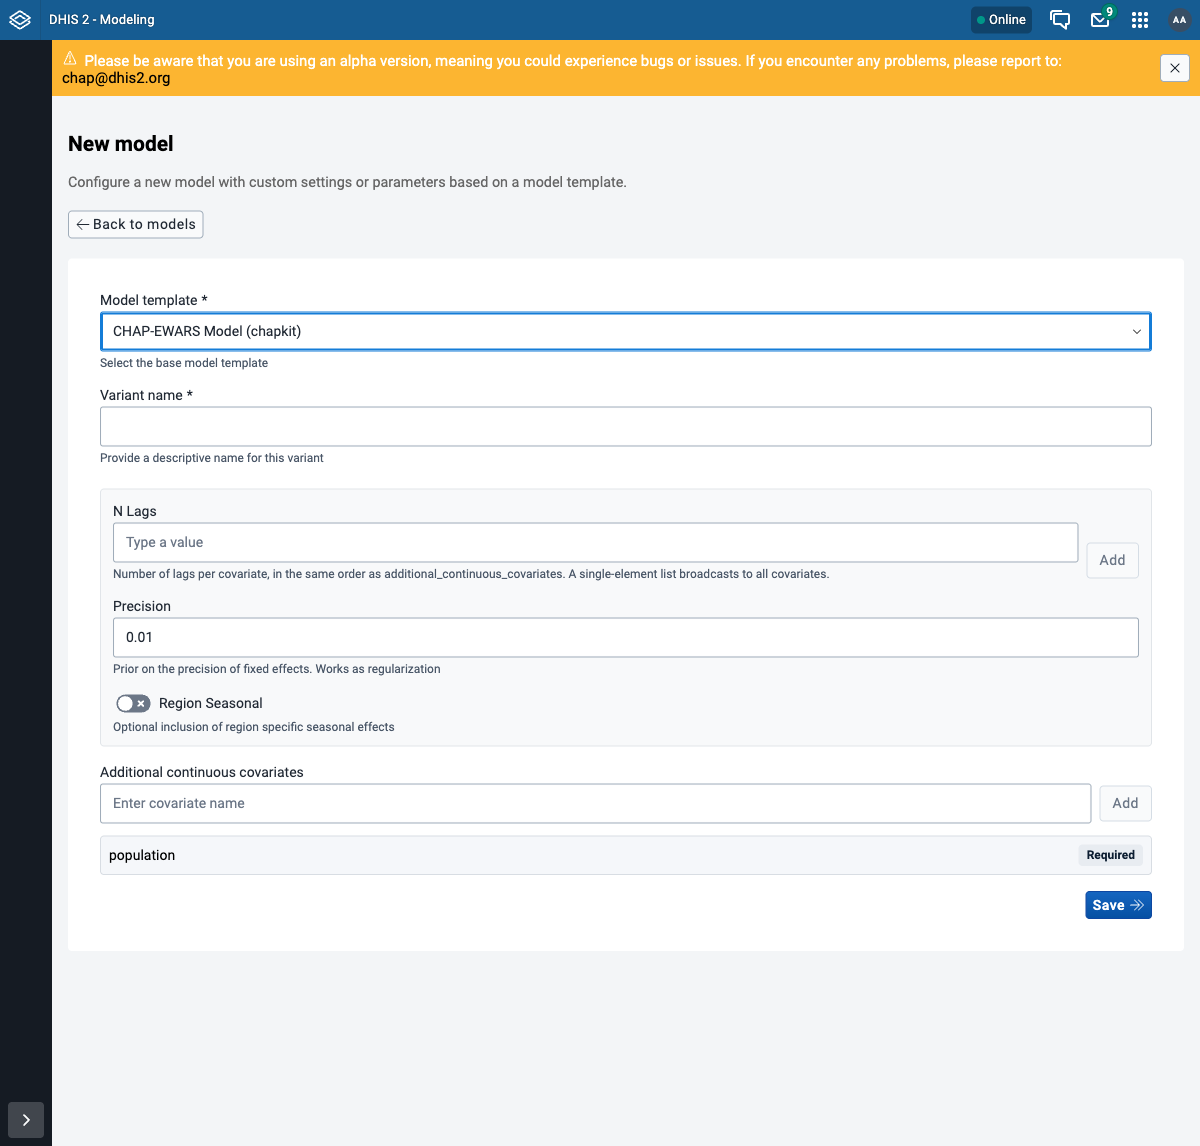
Step 1 - Open the New model form
In the Modeling app, open Models in the left menu and click New model.
Step 2 - Pick a model template
From Model template, choose CHAP-EWARS Model (chapkit). The form then shows exactly what that template lets you set - its options (N Lags, Precision, Region Seasonal) and its required covariate (population, already listed and marked Required). This is the same template and options the API version inspects with curl.
Step 3 - Fill in the variant
Match the variant from the API version:
- Variant name:
EWARS climate + region-seasonal- the helper text under the field previews the full model name it will get. - N Lags: type
3and click Add (a3chip appears). - Precision: leave the default
0.01. - Region Seasonal: turn the toggle on.
- Additional continuous covariates: add
rainfallandmean_temperature(type each, then Add);populationis already there, marked Required.

N Lags is required
Saving with N Lags empty is rejected with a "Required" error - even though the field has
no asterisk like Variant name does. Add a value (here 3) before you save.
Step 4 - Save and use it
Click Save. The variant appears in the Models list as CHAP-EWARS Model (chapkit) [Ewars climate + region-seasonal], alongside the stock models, and is usable straight away. Run it however you ran step 6: it shows up in the model picker (Evaluate -> New evaluation -> Select model) under its display name - pick it and evaluate or predict with it exactly as before.
Saving is idempotent
Saving the same variant again returns the existing model (same id) rather than creating a duplicate, so it is safe to repeat.
Where the predictions land
This variant targets disease cases (dengue), so its forecasts import into the existing
CHAP Dengue Cases (Any) - Weekly Quantile … data elements - the same outputs the stock model
uses. A model with a different target would need its own output data elements in DHIS2
first.
Assignment: configure your own model
- Open New model, pick the CHAP-EWARS Model (chapkit) template, and create a variant with Region Seasonal on and the climate covariates.
- Confirm it appears in the Models list (and in the Evaluate model picker).
- Run an evaluation with it.
Where to go next
You have completed the main workshop path. Run the custom variant with the shared demo workflow, or jump to the reference guides to diagnose jobs, inspect stored results, back up data, or upgrade CHAP. To script the same configuration, see the API version.