Register your model with CHAP
This is step 8b. Your scaffolded model runs and passes chapkit test on
its own. Now you connect it to chap-core: a chapkit model self-registers with chap when you
point it at chap's registration endpoint. Once registered, it appears in chap-core's model list
and in the Modelling App exactly like the built-in models, so the
evaluation / prediction / configure flows all work
on it unchanged.
Before you start
Run chap from the Development setup (source)
(the chap-core repo). You attach your model as a compose overlay on chap's own network, so
chap can reach it by name - which the bundled image stack is not set up for. Your model
project from step 8a should sit next to the chap-core folder.
Step 1 - How registration works
The scaffolded main.py ends with .with_registration(). That call does nothing until the env
var SERVICEKIT_ORCHESTRATOR_URL is set to chap's register endpoint. When it is, the
service registers itself on startup and pings periodically to stay alive. chap then syncs it
into its model list - it shows up as a model template (flagged usesChapkit) and chap seeds a
ready-to-run configured model from it. chapkit's
Deploying to chap-core
guide documents this registration flow in full.
Step 2 - Add a compose overlay onto chap-core
In the chap-core folder, create compose.my-model.yml - the same pattern chap uses for
EWARS (compose.ewars.yml):
services:
  my-model:
    build: ../my-model          # path to your scaffolded project
    # or, to use a published image instead of building:
    # image: ghcr.io/your-org/my-model:latest
    environment:
      # $$ escapes the $ for Docker Compose
      SERVICEKIT_ORCHESTRATOR_URL: http://chap:8000/v2/services/$$register
    depends_on:
      chap:
        condition: service_healthy
The service name (my-model) is how chap reaches it on the shared network - no host addresses
or ports to configure.
If your chap requires a registration key
A chap server can lock down registration by setting SERVICEKIT_REGISTRATION_KEY; the model
must then send the matching key (the EWARS overlay has a commented SERVICEKIT_REGISTRATION_KEY
line for this). The from-source dev stack in these guides does not set it, so you can
leave it out.
Step 3 - Bring it up alongside chap
Layer your overlay onto the from-source stack:
Your model builds, starts, and registers within a few seconds.
Step 4 - Verify it registered
Through the DHIS2 route (auth at DHIS2, as everywhere else):
export CHAP="http://localhost:8080/api/routes/chap/run"
export AUTH="admin:district"

# the live chapkit services
curl -fsS -u "$AUTH" "$CHAP/v2/services" | jq -r '.services[].id'
# your model as a model template, flagged as chapkit
curl -fsS -u "$AUTH" "$CHAP/v1/crud/model-templates" \
  | jq -r '.[] | select(.name=="my-model") | "\(.name)  usesChapkit=\(.usesChapkit)"'
# the configured model chap seeded from it
curl -fsS -u "$AUTH" "$CHAP/v1/crud/configured-models" \
  | jq -r '.[] | select(.name=="my-model") | "\(.id)\t\(.displayName)"'
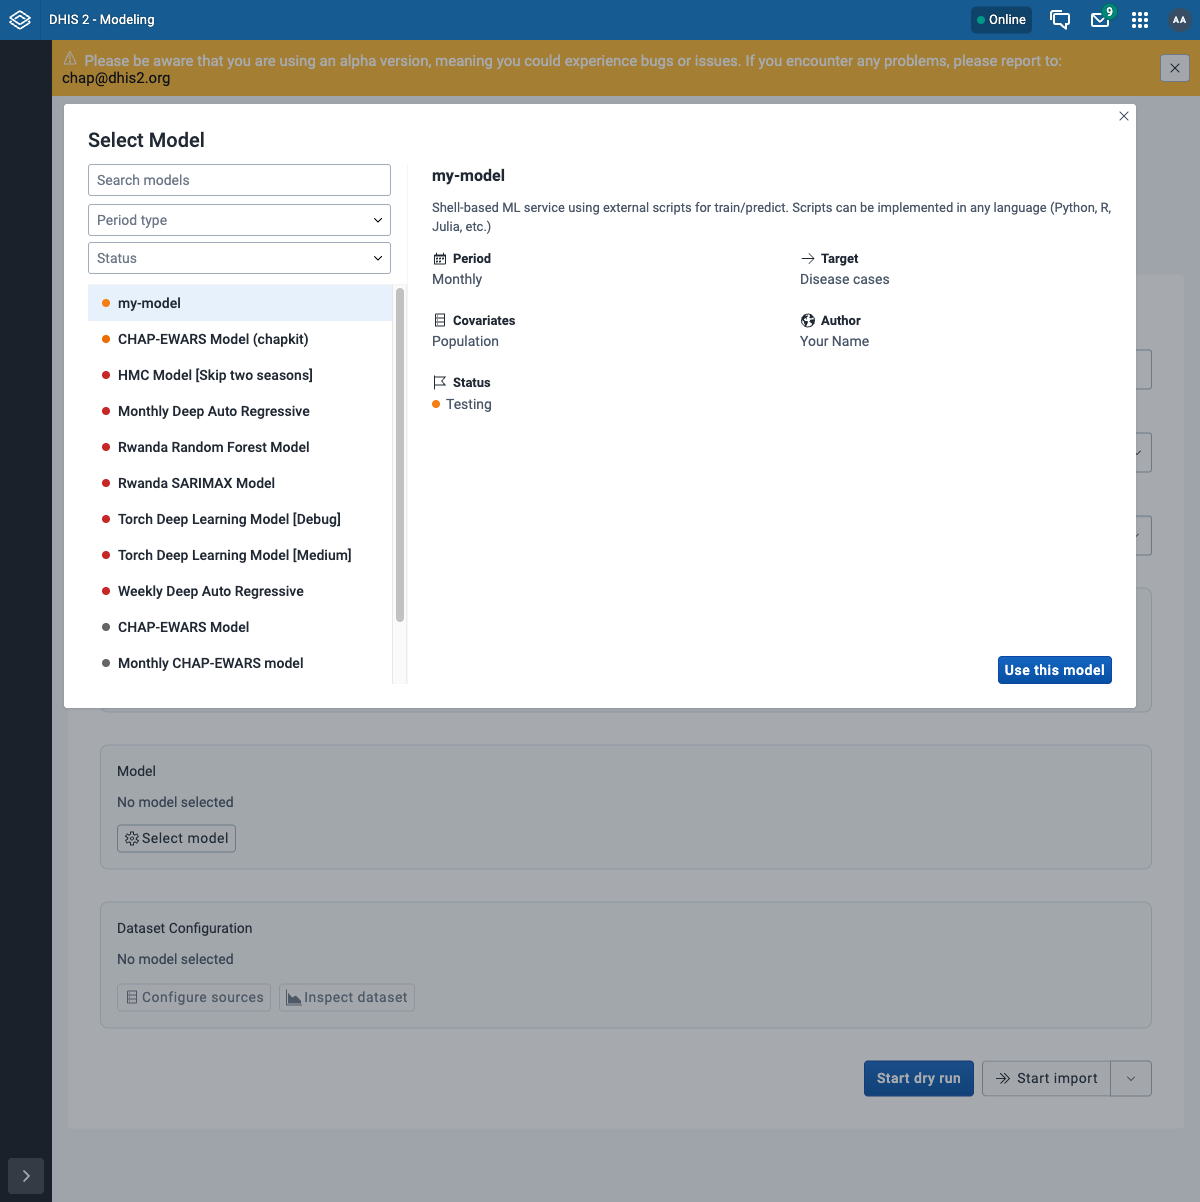
In the Modelling App it now appears in the model picker (Evaluate → New evaluation → Select
model), right next to CHAP-EWARS - with the metadata from your MLServiceInfo:
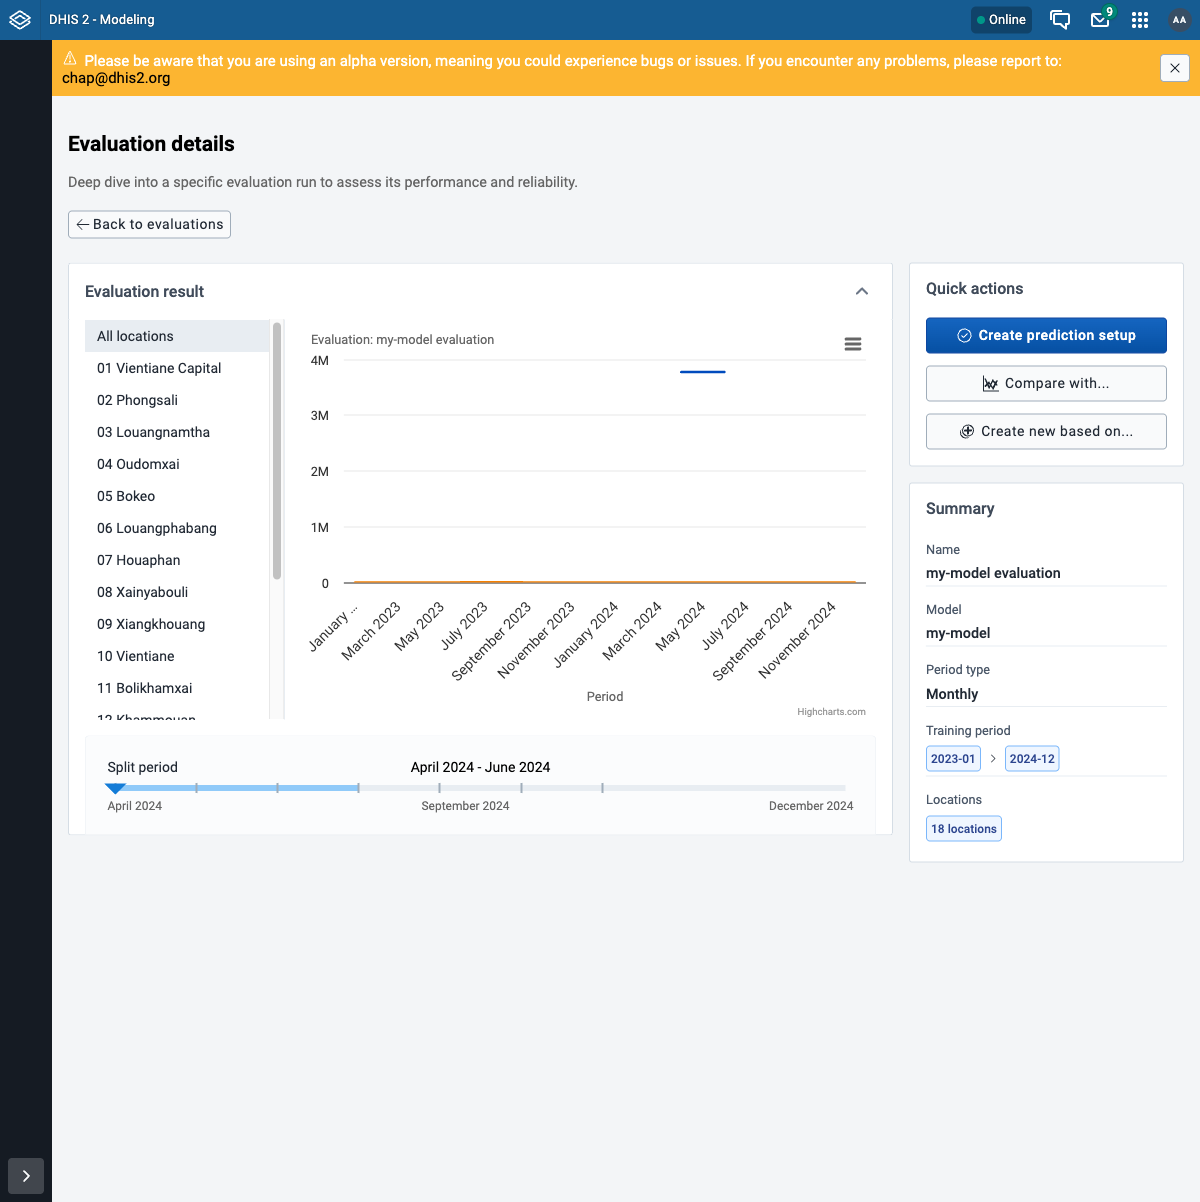
Step 5 - Run it like any other model
From here, nothing is special: evaluate or predict with it exactly as in the
API walkthrough (or in the app), setting the modelId to your model's name. The
result opens like any other - here the example model's flat line is its naive "predict the
historical mean" forecast against the actual cases:
Give the backtest a covariate
A backtest predicts the target from future covariate values, so your model must declare
at least one covariate (required_covariates=["population"] in MLServiceInfo) and the data
must supply it - with only the target there is nothing to predict from. The scaffold's
example model also just averages its numeric inputs, so expect meaningless metrics until you
put real logic in the scripts. That contrast is the point: swap in your model and the same
flow scores it.
Sharing and lifecycle
- Share it: publish the image to a registry and use
image:instead ofbuild:in the overlay (the EWARS overlay does this). R models pull from chapkit-images. - Deregistration: if the service stops pinging, chap archives its template after the TTL
- past runs still resolve, but it drops out of the model picker.
Assignment: your model in CHAP
- Add the overlay and bring the stack up; confirm
/v2/serviceslists your model. - Confirm it shows as a
usesChapkittemplate and appears in the Modelling App picker. - Run an evaluation against it (with a covariate) and watch the job reach
SUCCESS.
What's next
You have taken a model from chapkit init to running inside CHAP and DHIS2. That completes the
build-a-model track; from here you can iterate on the scripts, publish an image, and share it.